
What to Do if Framing is Offset with Lumos Ultra
If the red light framing preview does not align with the actual engraved result, you’ll need to calibrate the preview offset values in the software. Proper calibration ensures that what you see during framing matches exactly where the laser will engrave.
Step 1: Perform a Test Engraving
Start by creating a reference shape to compare against the red light preview.
- Draw a test shape
In the software, draw a 30 × 30 mm square on the canvas. - Set engraving parameters
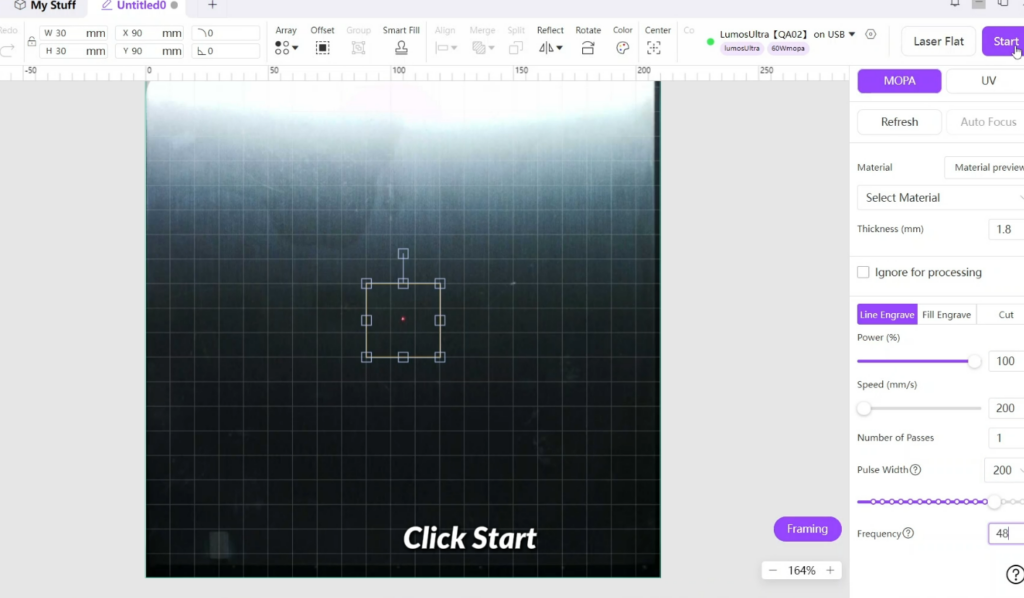
- Run the engraving job
Click Start → Send, then press the physical button on the machine to engrave the square onto a scrap/test material. - Check alignment
After engraving:- Click Start again
- Select Rectangle Framing
- Observe the red light outline
If the red frame does not perfectly overlap the engraved square, an offset is present.
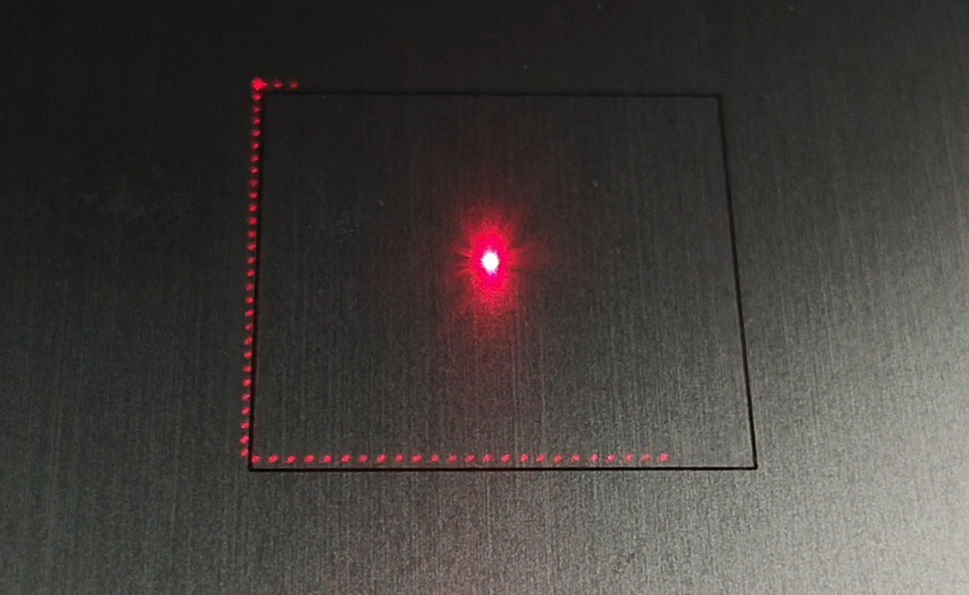
Step 2: Open the Calibration Settings
- Click the Settings icon (gear icon) in the top-right corner of the software.
- Find the MOPAPreview Light Offset fields for:
- X (horizontal offset)
- Y (vertical offset)
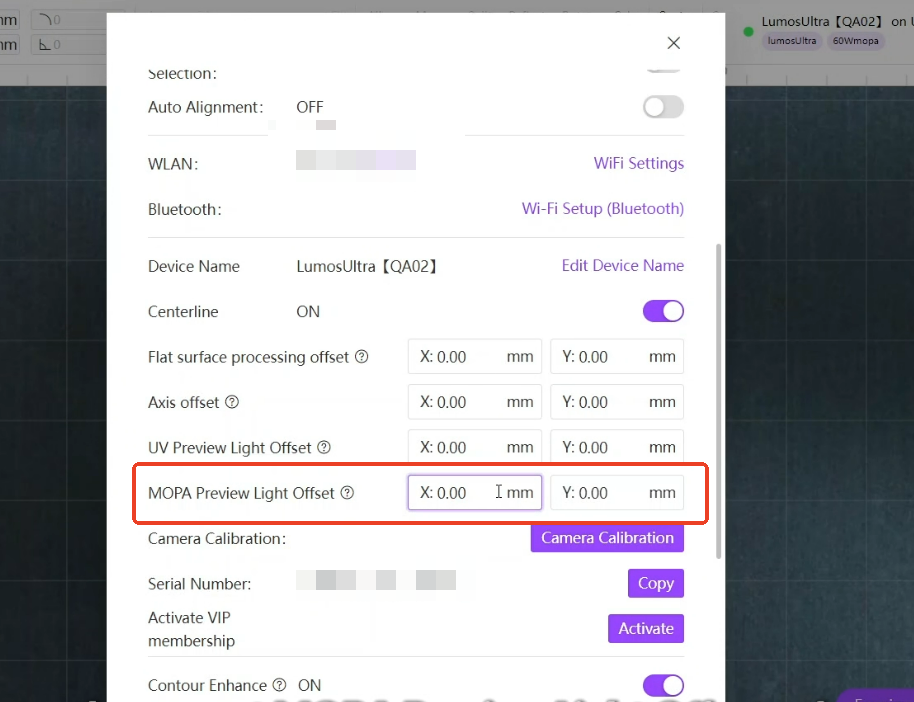
Step 3: Measure and Adjust Offset Values
- Measure the offset
Use a ruler or calipers to measure the distance between the engraved square and the red light frame in both X and Y directions. - Determine direction
- If the red frame appears to the left of the engraving → increase X offset
- If the red frame appears to the right → decrease X offset
- If the red frame appears above the engraving → increase Y offset
- If the red frame appears below → decrease Y offset
- Enter values
Input the measured offset values into the X and Y fields. - Save changes
Click OK or Confirm to apply and save the settings.
Tip: Make adjustments in small increments (e.g., 0.5–1 mm) for more precise calibration.
Step 4: Verify the Calibration
- Return to the main canvas.
- Run Rectangle Framing again on the same engraved square.
- The red light should now perfectly trace the edges of the square.
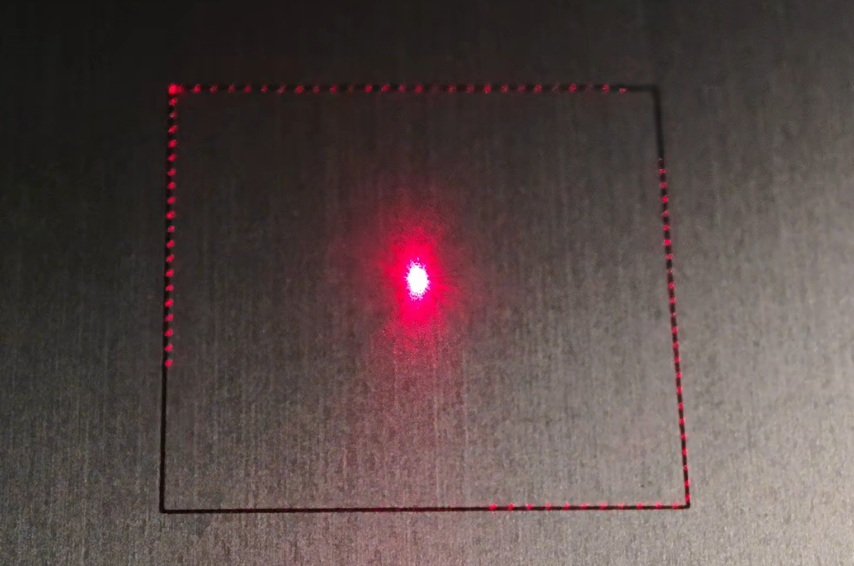
If alignment is still slightly off, repeat the measurement and adjustment process until the framing and engraving match exactly.
Additional Tips
- Always use a flat, stable test material during calibration.
- Recalibrate if you:
- Change laser sources
- Update firmware/software
- Notice consistent framing misalignment