
How to Replace the Exhaust Fan for WeCreat Vista 10W
Overview
This guide explains how to replace the exhaust fan on the WeCreat Vista 10W, including how to remove the existing fan and install a replacement.
Confirm the Exhaust Fan Issue Before Replacement
Before replacing the exhaust fan, please confirm that the fan is causing the issue.
Check the following:
- The exhaust fan does not spin when the machine is running.
- The exhaust fan makes abnormal noise.
- The smoke extraction performance is significantly reduced.
If the exhaust fan does not work properly, proceed with the replacement steps below.
Prepare Tools
- The screwdriver included with your machine.
- Replacement exhaust fan
Remove the Old Exhaust Fan
Step 1. Remove the Rear Cover Panel
- Power off the machine and unplug the power cable before starting the replacement.
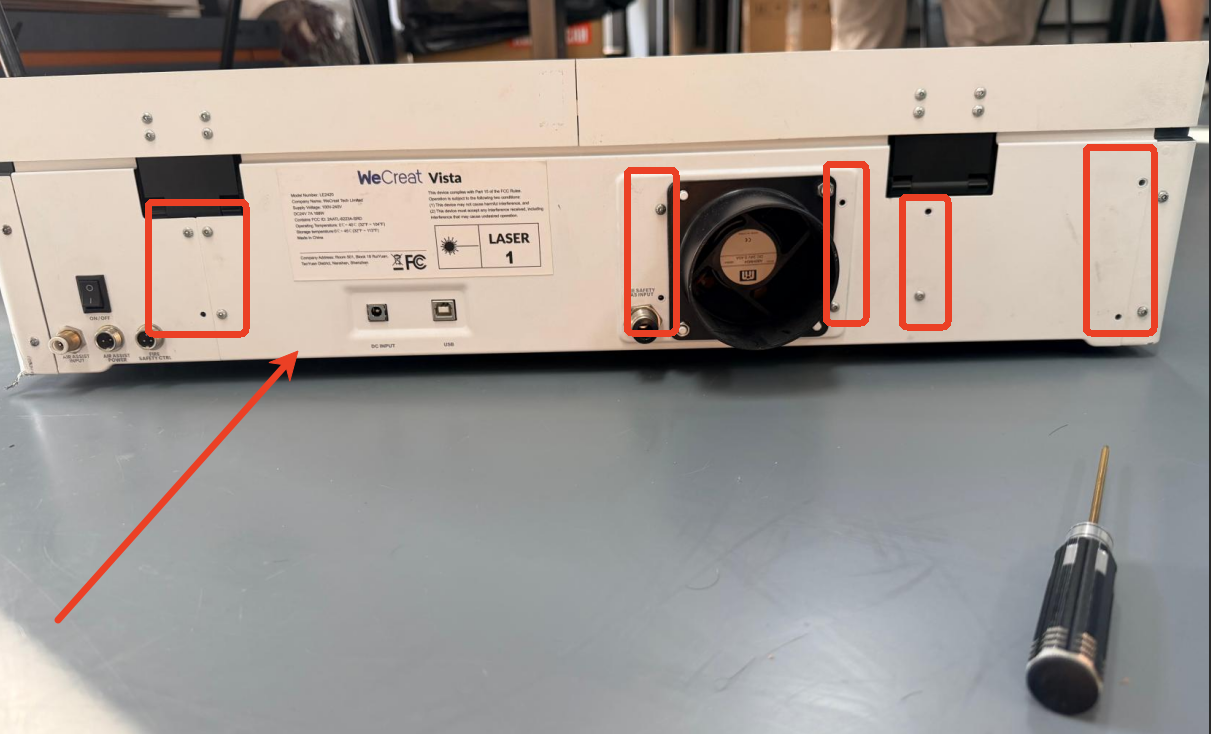
- Locate the rear cover panel on the back of the Vista machine.
- Use a screwdriver to remove the screws securing the rear cover panel.
- Keep the screws in a safe place, as they will be reused during reassembly.
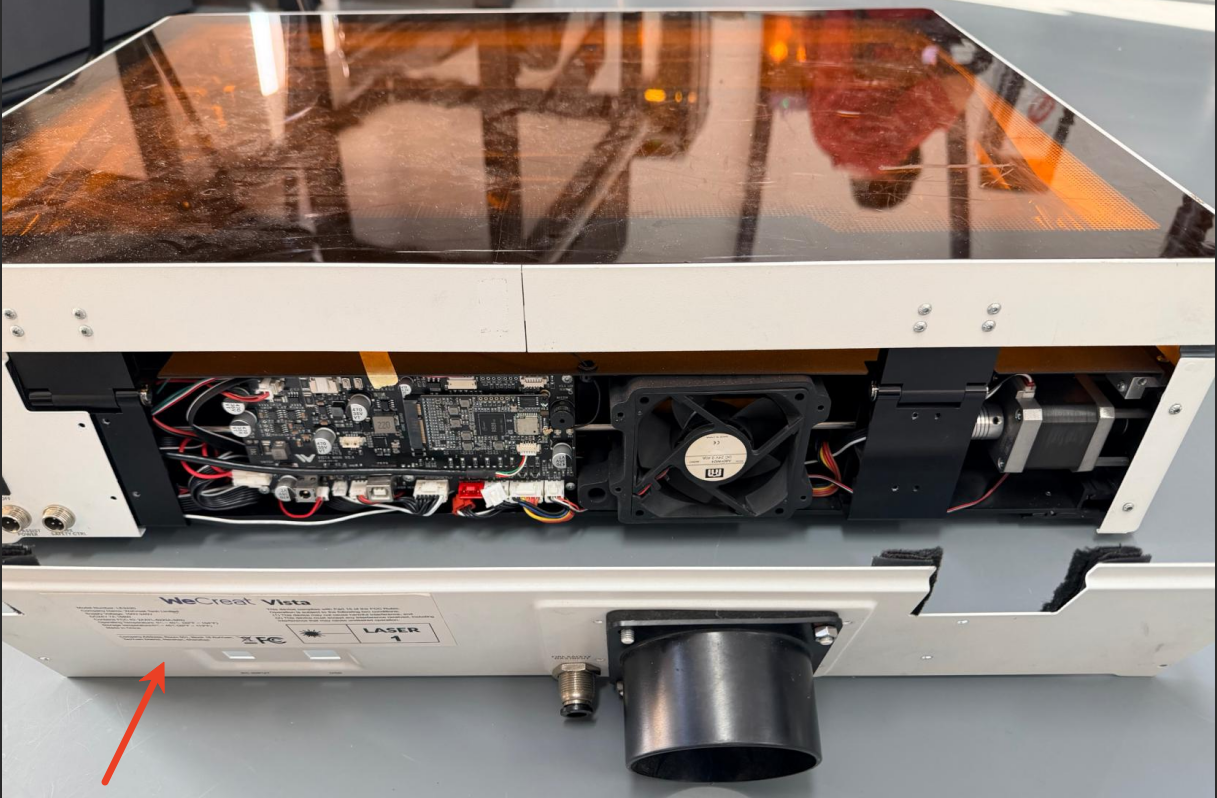
- Carefully remove the rear cover panel to access the exhaust fan assembly.
Remove these screws to detach the rear cover panel
Step 2. Remove the Exhaust Fan Assembly
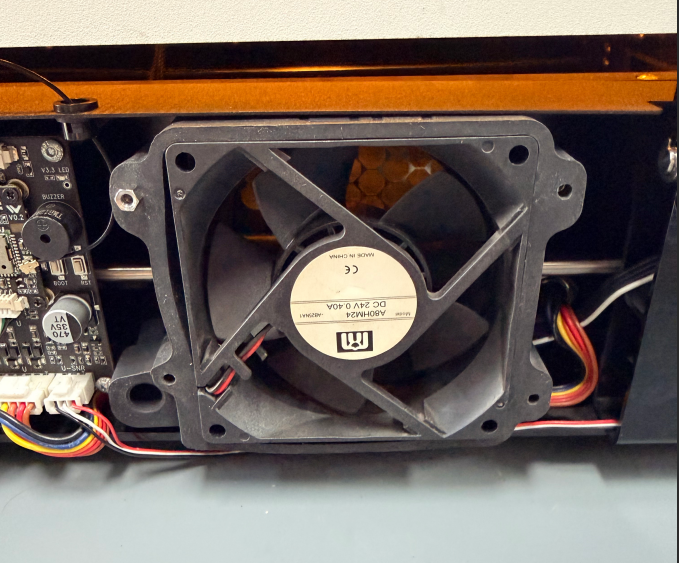
- After removing the rear cover panel, locate the exhaust fan assembly inside the machine.
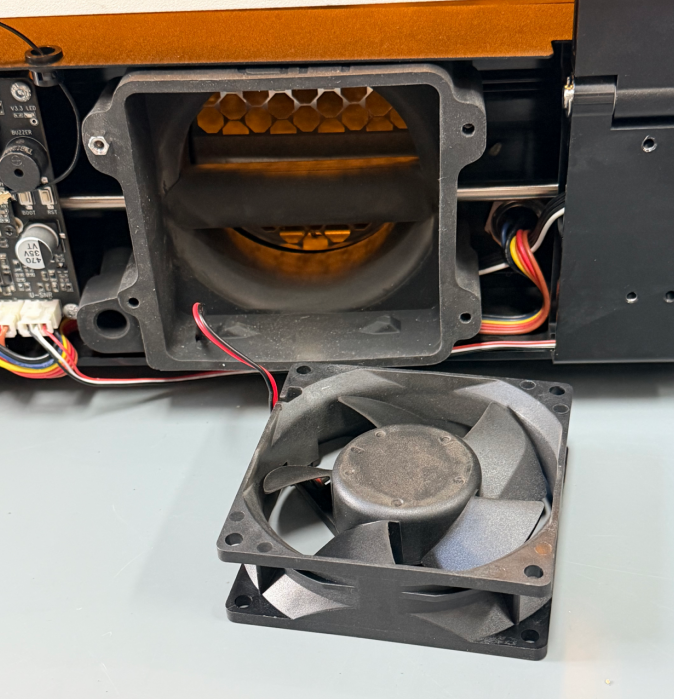
- Cut the exhaust fan cable to disconnect the old fan, then remove it from the mounting position.
- Set the removed fan aside for replacement.
Exhaust fan location after removing the rear cover panel
Correct way to remove the exhaust fan
Install the New Exhaust Fan
Step 1. Connect the New Exhaust Fan Cable
method 1:
- Make sure the new exhaust fan is installed in the correct direction.
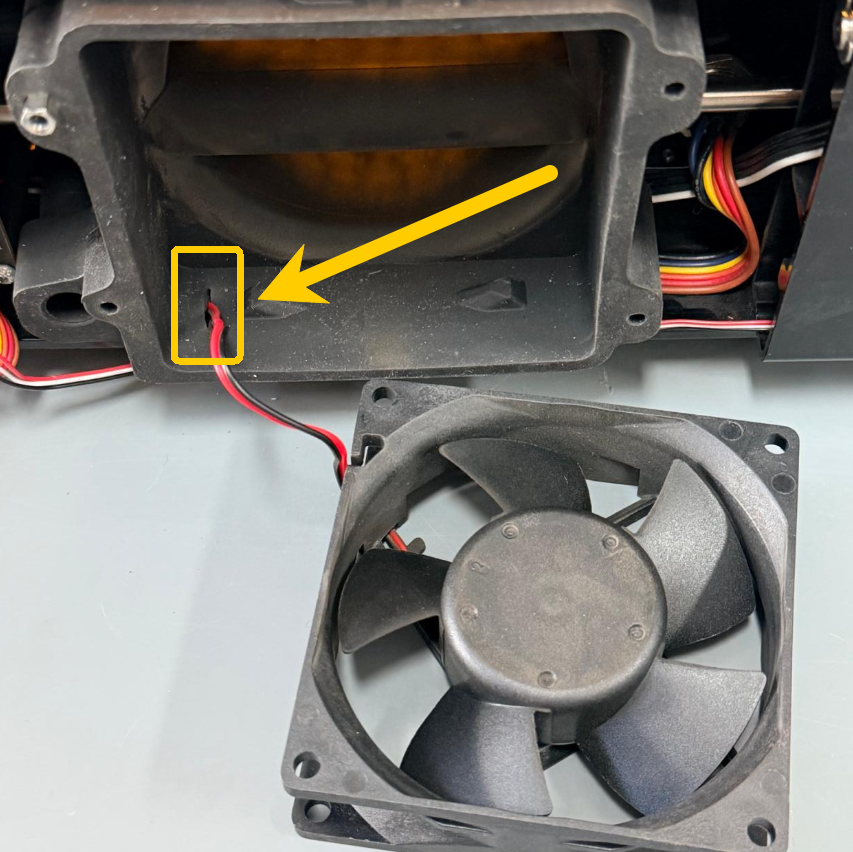
- Route the fan cable through the cutout at the bottom of the fan protective cover and arrange the cable neatly along the bottom.
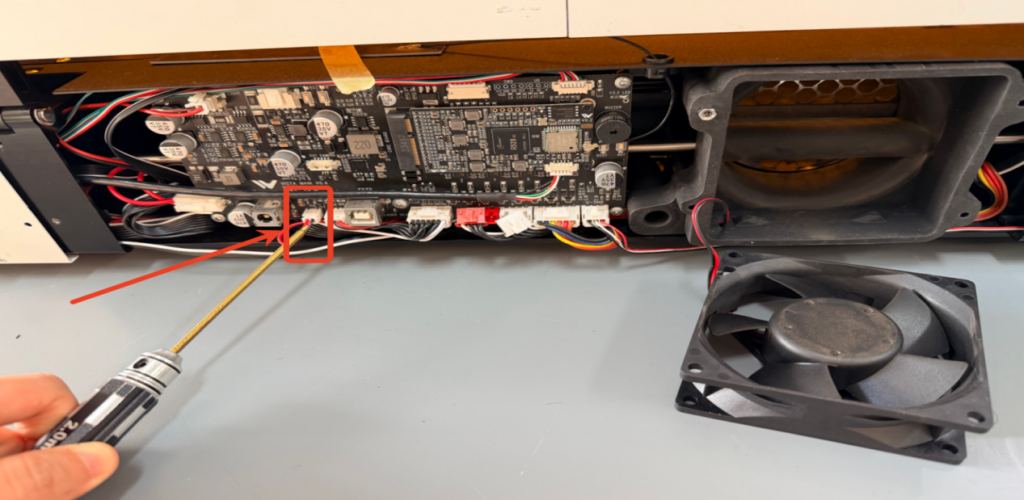
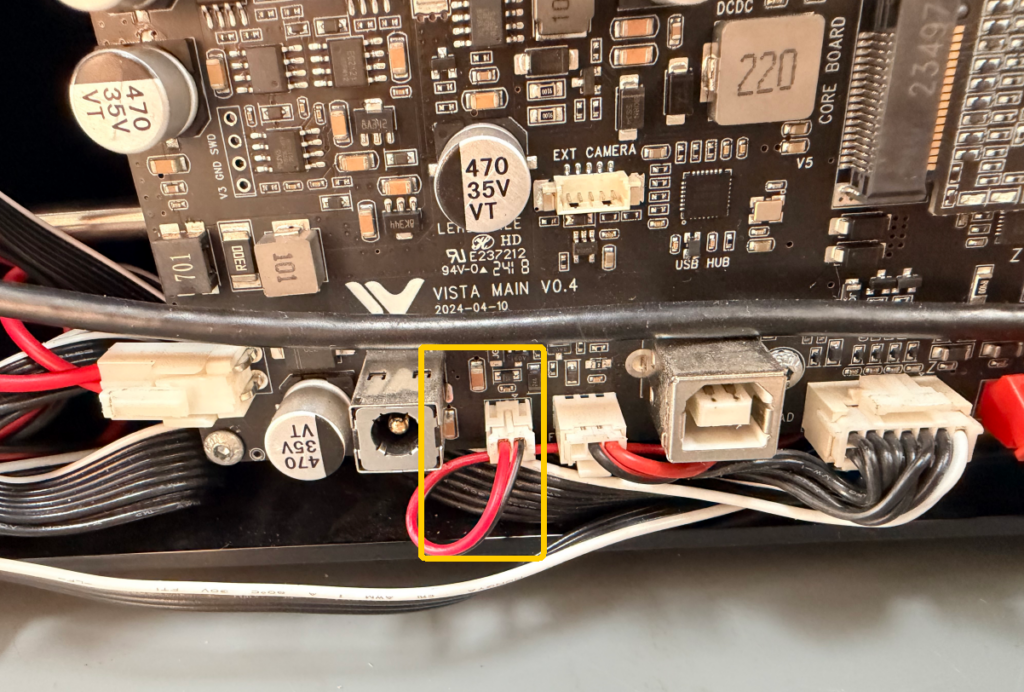
- Insert the fan cable connector into the corresponding port carefully.
- Make sure the connector is fully seated and securely connected.
Cable routing through the cutout on the fan protective cover
method 2:
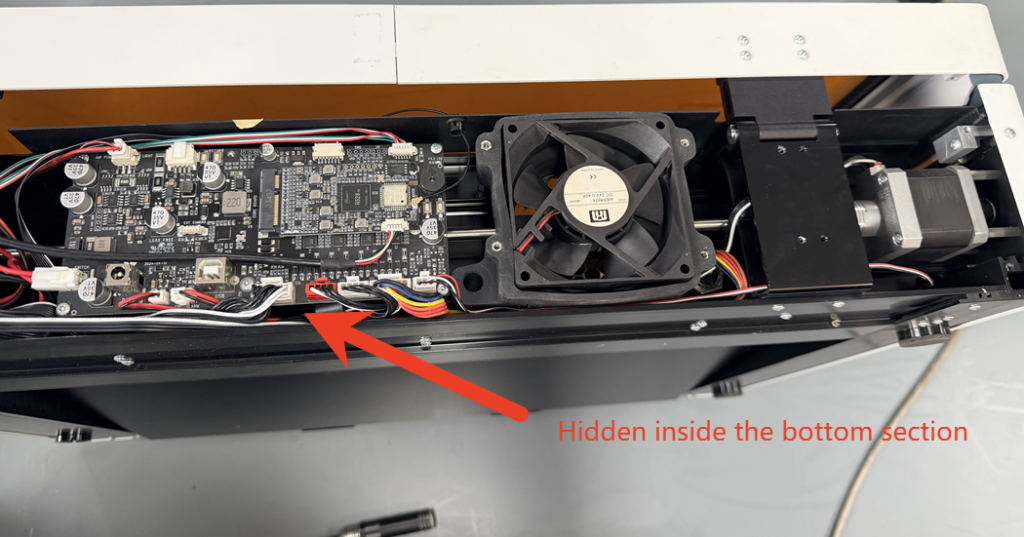
Alternatively, route the fan cable from outside the fan protective cover, and arrange the cable neatly along the bottom.
Step 2. Reinstall the Rear Cover Panel
- Align the rear cover panel with the machine frame.
- Secure the panel using the screws removed earlier.
- Tighten all screws evenly to ensure the panel is firmly attached.
Test the New Exhaust Fan
After installation, power on the machine and verify that the exhaust fan is working properly.
- Open WeCreat MakeIt software and connect your machine.
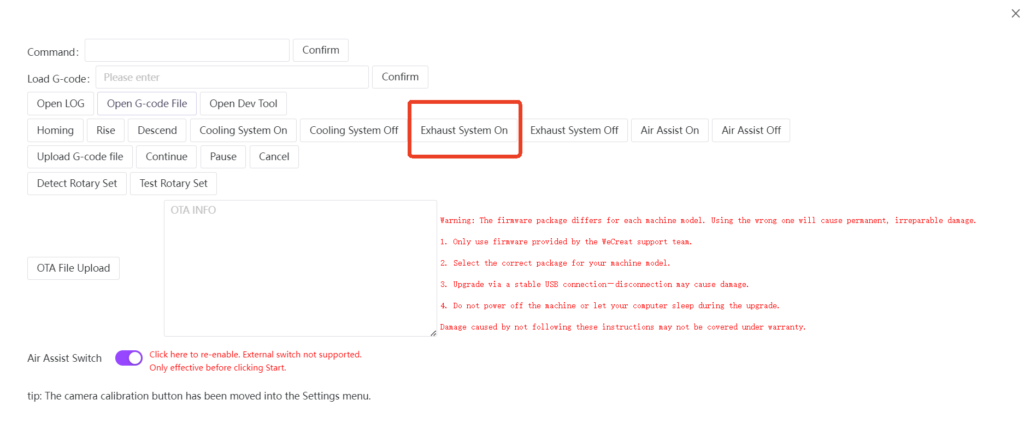
- Enter the Debug Panel by pressing Ctrl + Shift + P (Windows) or Command + Shift + P (Mac).
- Click “Exhaust System On” to activate the fan.
- Confirm that the exhaust fan starts running normally.
Troubleshooting
The Exhaust Fan Does Not Spin After Replacement
Please check:
- Whether the exhaust fan cable is connected properly.
- Whether the fan connector is fully inserted and securely connected.
- Whether the replacement fan is installed correctly.
Weak Smoke Extraction Performance
Please check:
- Whether the exhaust hose is connected properly.
- Whether the exhaust path is blocked.
- Whether the exhaust fan is installed in the correct direction.
Contact Wecreat support
If the issue persists, please contact WeCreat Support and provide:
- Machine model
- Machine SN
- Software version
- Firmware version
- A video showing the issue