
How to Properly Adjust the Focal Distance in MOPA Mode?
When using the MOPA laser for engraving, if you notice that the machine appears to have insufficient power or a relatively weak laser spot even after completing the focusing process (with the two red dots aligned), resulting in engraving performance that is significantly below what would normally be expected at the selected power level, it is possible that the MOPA laser is not operating at its optimal focal distance.
Each machine undergoes strict focal distance calibration and testing at the factory before shipment. Under normal circumstances, when the two red dots used for focusing are perfectly aligned, the MOPA laser should also be positioned at its optimal focal distance.
However, during transportation or normal use, the MOPA lens may become slightly misaligned due to impact, vibration, or other unexpected factors. In such cases, the two red dots may still align while the actual optimal focal distance has shifted slightly from the position indicated by the red dots.
In this situation, we recommend performing the following tests and procedures to identify the actual optimal focal distance and manually adjust the MOPA lens so that the position where the two red dots align once again corresponds to the optimal focal distance.
Please follow the steps below to properly make the adjustment:
- 1. Properly connect the Lumos Ultra and MOPA.
- 2. Turn on the machine and connect it to the computer using the USB cable.
- 3. Place a stainless steel sheet on the working panel.
- 4. Open the software and click New Project.
- 5. Select MOPA mode and click the Refresh button.
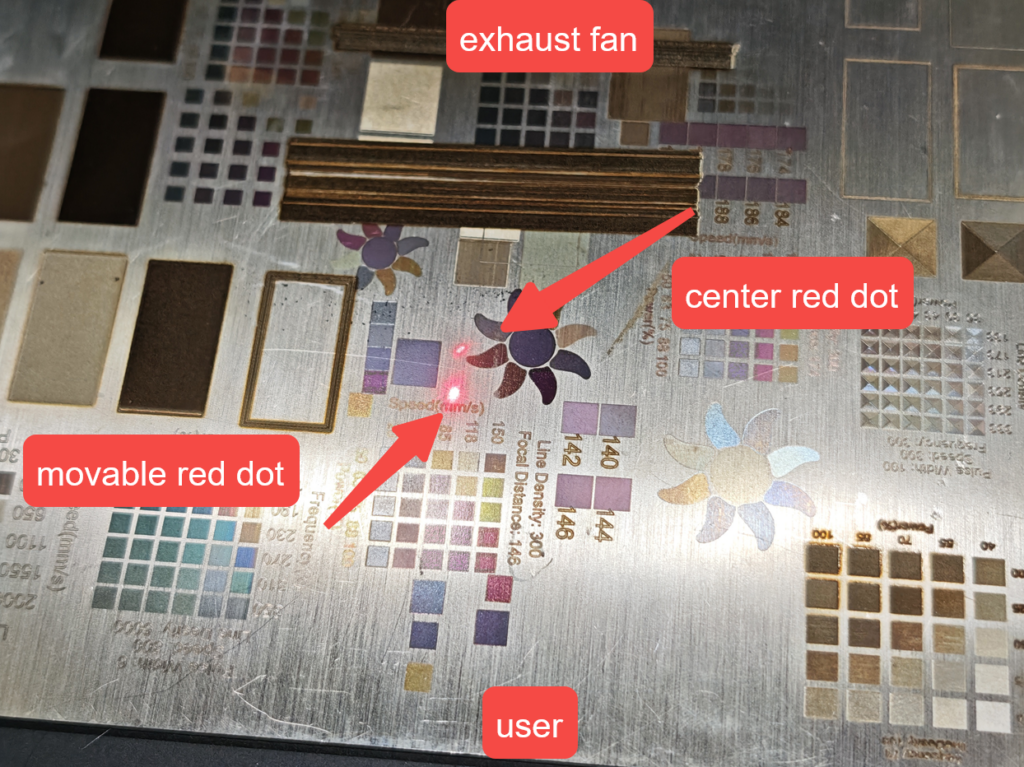
- 6. Manually turn the knob until the two red dots overlap.
- 7. Draw a rectangle on the canvas.
- 8. Select Fill and set the parameters as follows:
- 9. Click Start.
- 10. Click Send to send the job to the machine.
- 11. Press the Start button on the machine to begin processing.
- 12. If the sparks are weak, slowly turn the knob until the sparks become the brightest.
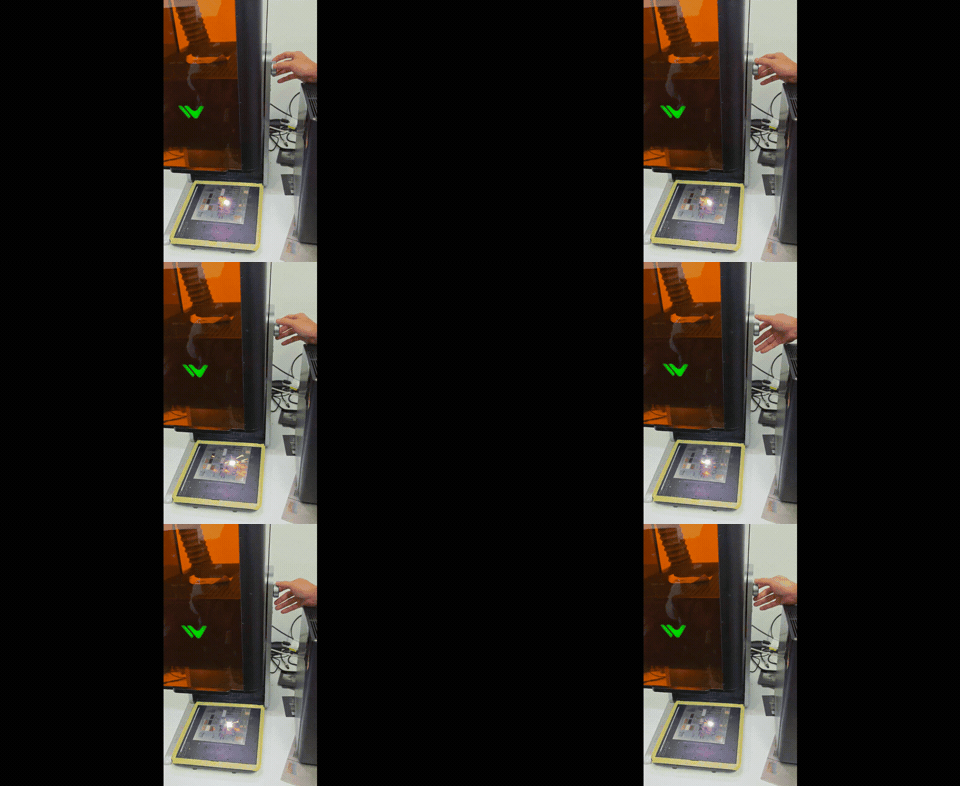
- 13. Press and hold the Start button on the machine to cancel the job.
- 14. Observe whether the red dots on the stainless steel sheet have shifted. Check whether the movable red dot is above or below the center red dot, and note the distance between the two dots.
- 15. Remove the MOPA isolator from the back of the machine.
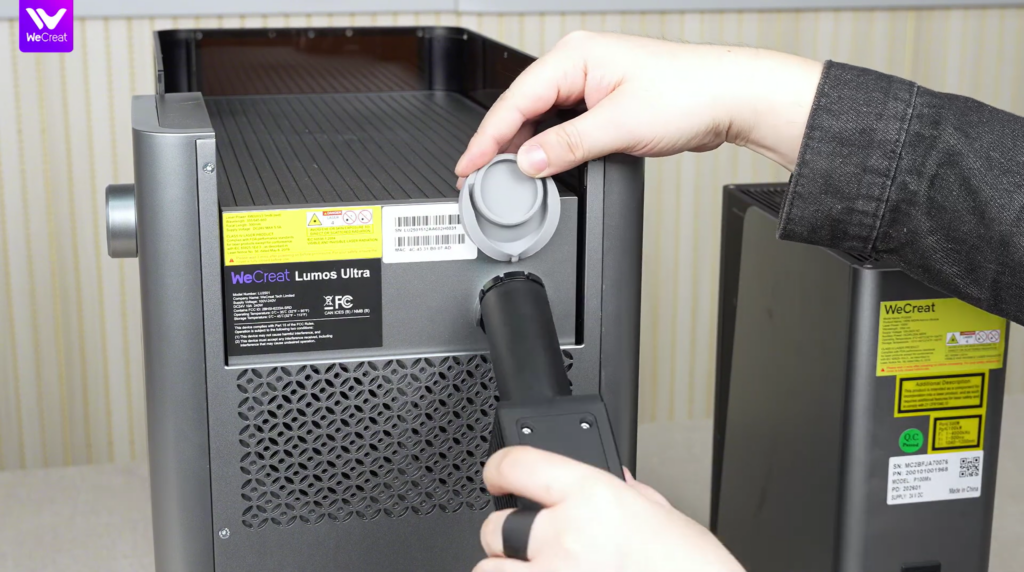
- 16. Turn the focusing lens assembly at the very front.
Note: When rotating the ring that secures the rotary lens, it may be difficult to turn because there may be adhesive applied to the ring. You can use an alcohol wipe to moisten the adhesive, then use tweezers to pry the adhesive out. Once the adhesive is removed, the ring should be able to rotate normally.
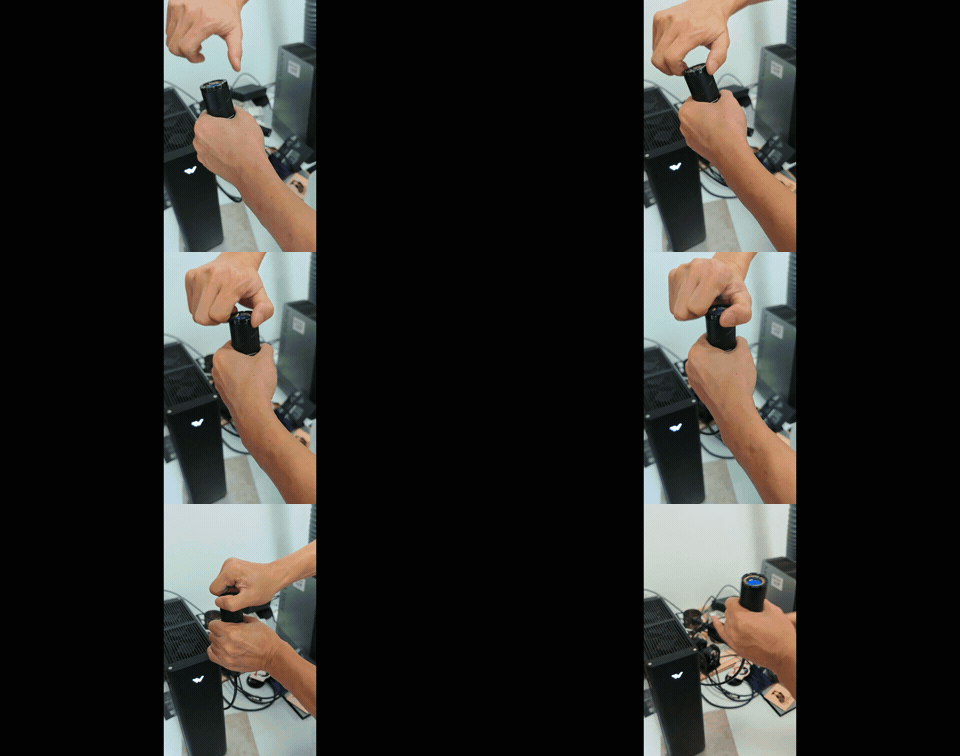
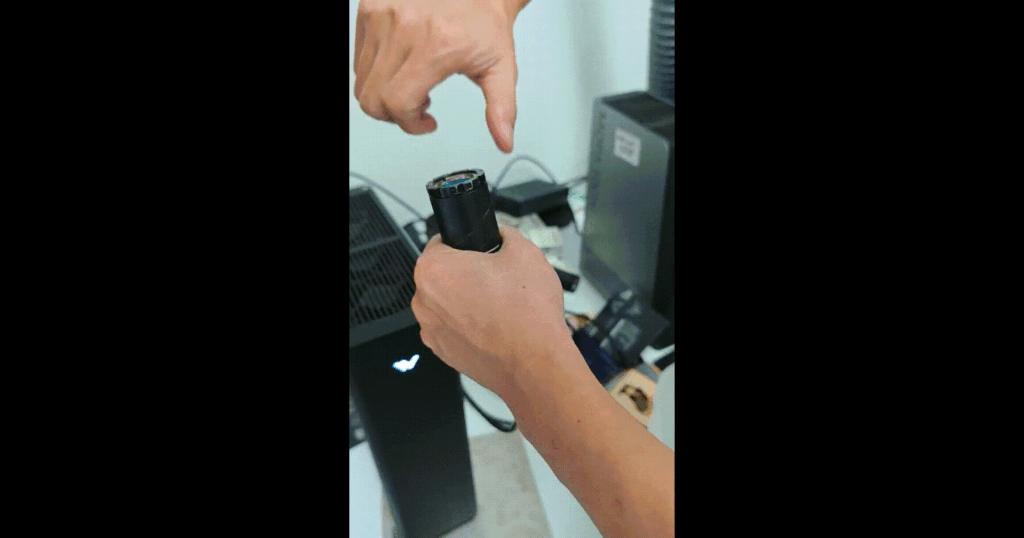
- 17. After making the adjustment, repeat Steps 9 to 11. If the sparks are still not at their brightest, turn the knob again until the sparks become the brightest.
- 18. Press and hold the Start button on the machine to cancel the job.
- 19. Observe whether the red dots on the stainless steel sheet are still misaligned.
- 20. Make further adjustments according to the method above.