
How to Replace the X-axis Belt for WeCreat Vision 20W/40W
Overview
If your WeCreat Vision 20W has issues such as abnormal X-axis movement, inaccurate engraving position, belt damage, or the laser module cannot move smoothly along the X-axis, the X-axis belt may need to be replaced.
Possible symptoms:
- Laser module moves unevenly along the X-axis
- Engraving position is offset
- X-axis belt is loose, worn, or broken
- Abnormal noise during X-axis movement
Related article: A loose X-axis belt can cause engraving offset.
https://help.wecreat.com/kb/what-to-do-if-image-distorted-during-engraving/
Tools Needed
the screwdriver provided with the machine
belt
Before You Begin
Before replacing the belt, please turn off the machine and unplug the power cord.
Remove the Existing X-axis Belt
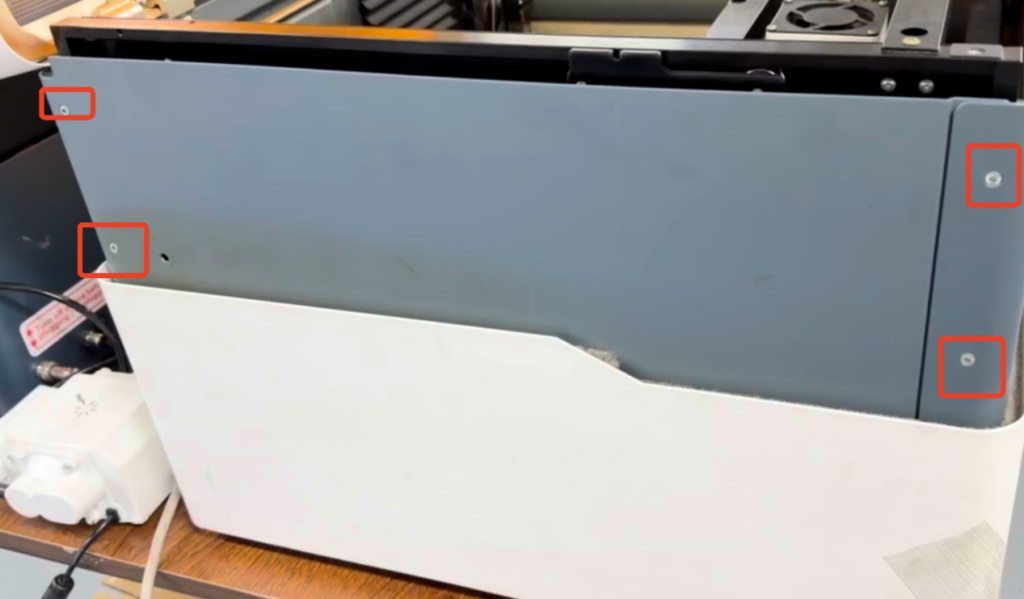
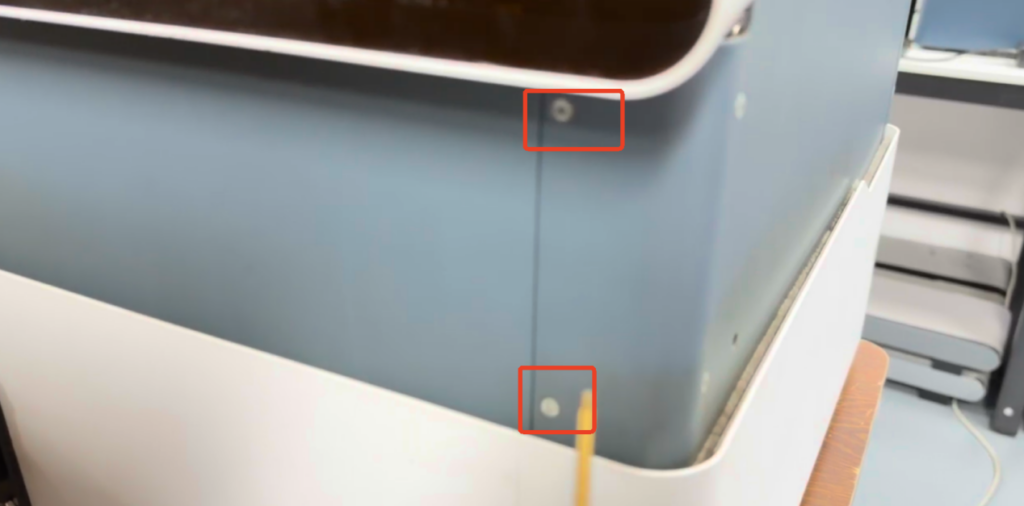
Step 1: Use a screwdriver to remove the screws securing the left side panel, including the screws located at the rear of the panel. Then remove the left side panel.
Step 2: Use a screwdriver to remove the two screws inside the left side of the X-axis assembly, then remove the center screw.
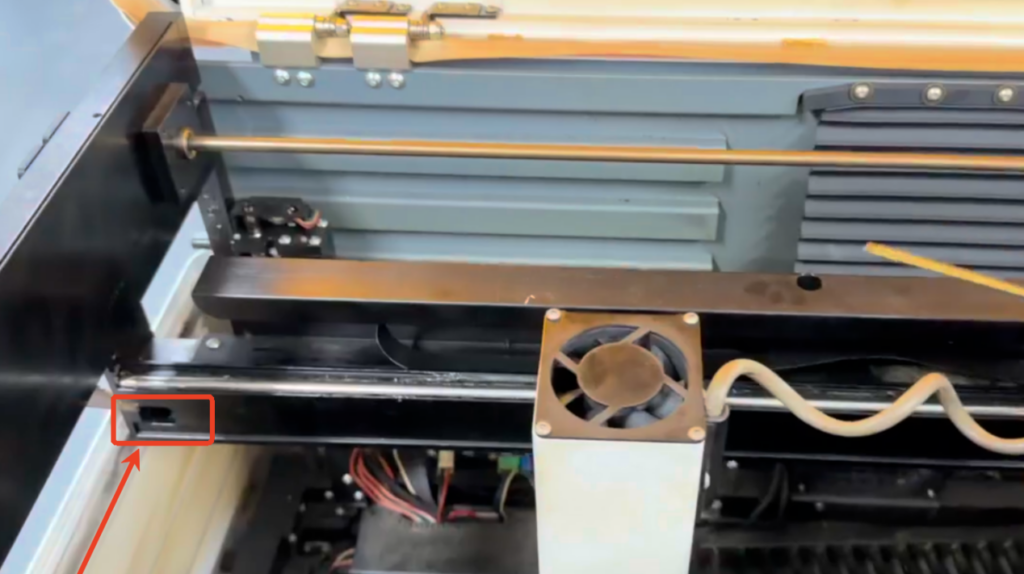
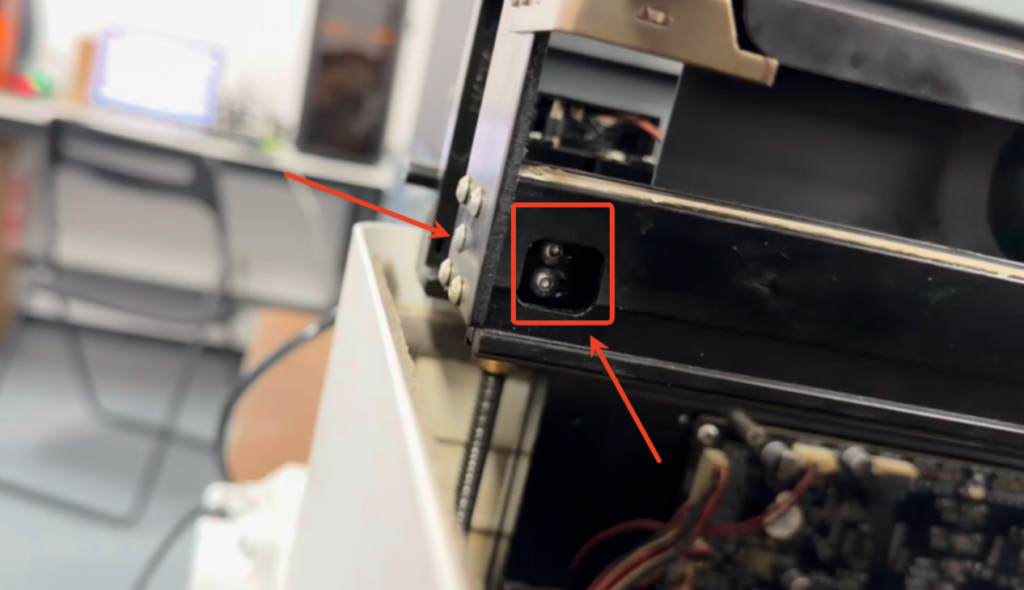
Step 3: After removing these three screws, the X-axis belt mounting end will loosen, causing the belt wheel to move and releasing the belt tension. Use a screwdriver to loosen and remove the center screw securing the lower belt wheel, then manually remove the belt from the other end of the X-axis belt mounting point.
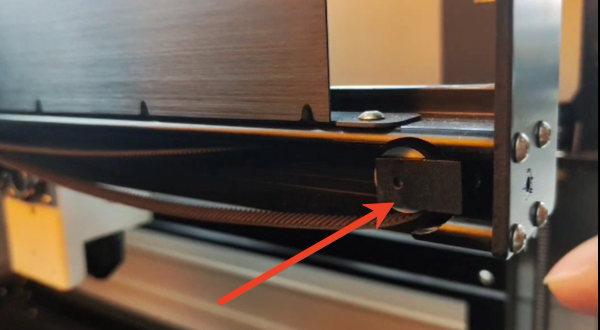
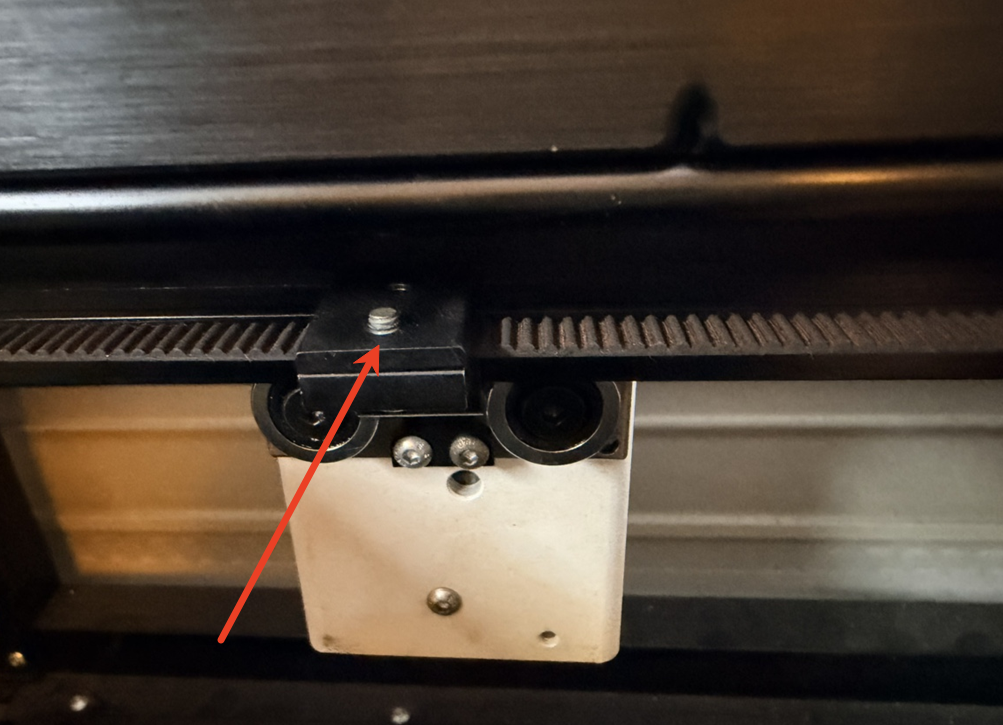
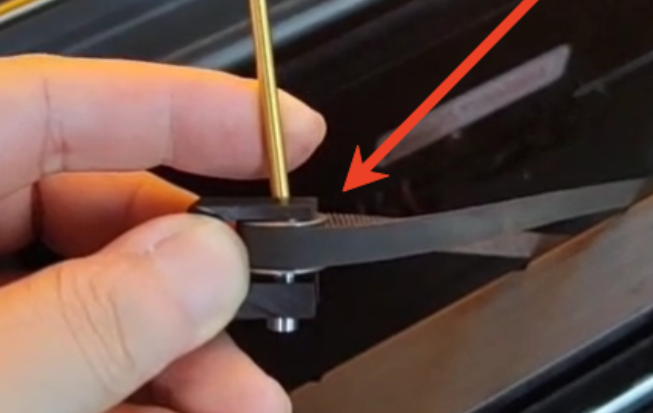
Step 4: Use a pointed tool to push the shaft pin out through the small hole, then remove the belt wheel.
Install the New X-axis Belt
Step 1: Install the new belt back onto the belt wheel, making sure the toothed side of the belt faces inward. Hold the lower belt wheel in place, then reinstall the center screw. Use your hand to loop the other end of the belt back onto the belt wheel. Make sure the belt is not twisted or crossed and is installed in the correct position.
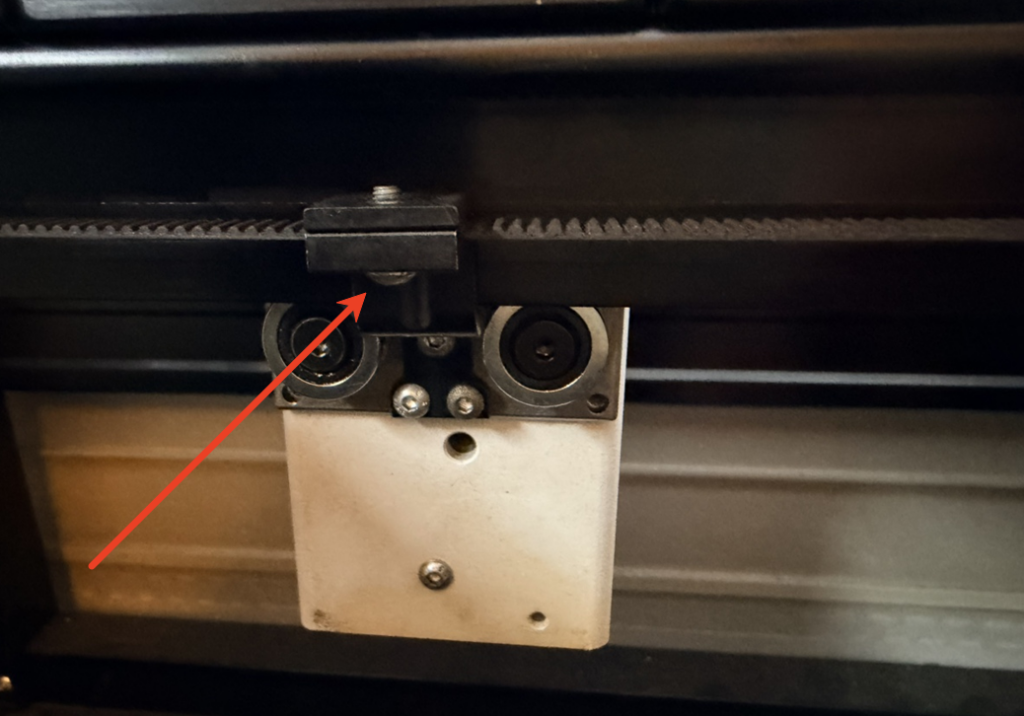
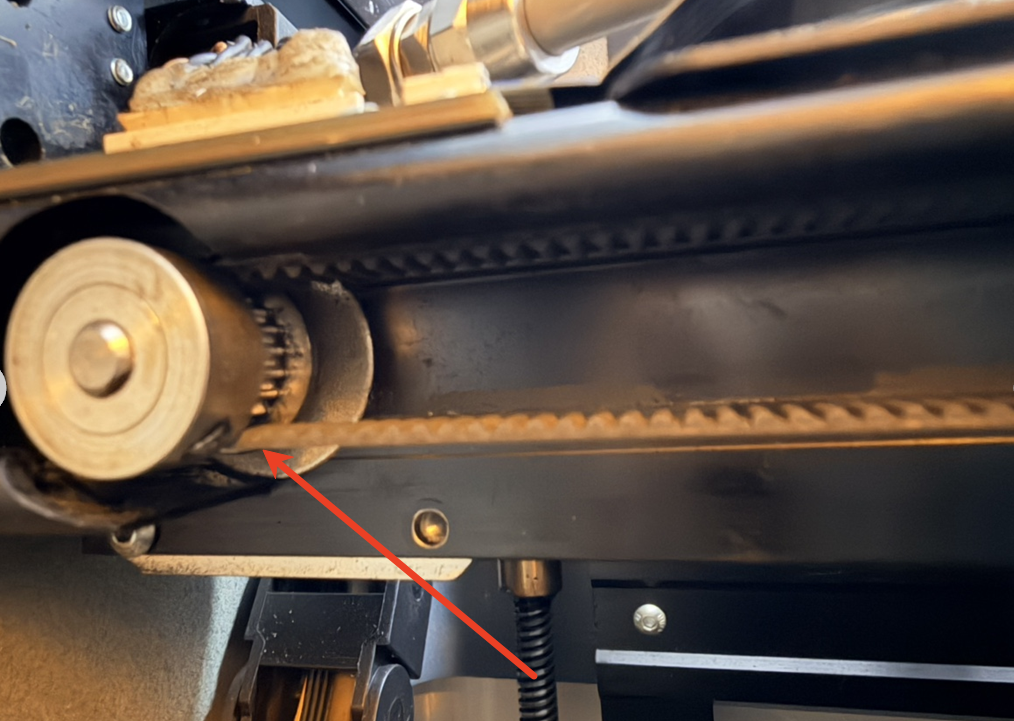
Note: ensure the belt wheel is installed correctly and aligned flush with the edge.
Step 2: Reinstall the belt wheel on the other end, making sure the side with the two screw holes is facing right. Then reinstall the two screws removed earlier. Do not fully tighten the screws yet to allow for belt tension adjustment after installation. Reinstall the center screw on the side as well. Gently pull the belt by hand to check whether it moves smoothly and verify the belt tension. Once confirmed, tighten these screws. Do not overtighten the screws, as excessive belt tension may cause the laser head to move unevenly or become stuck.
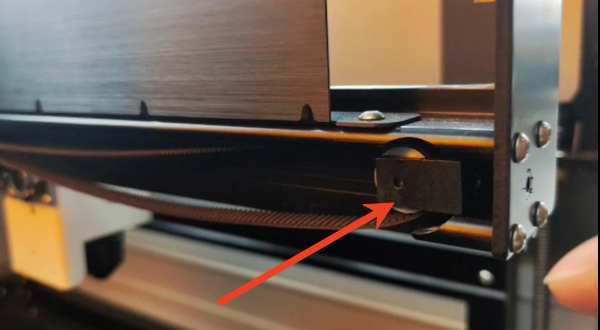
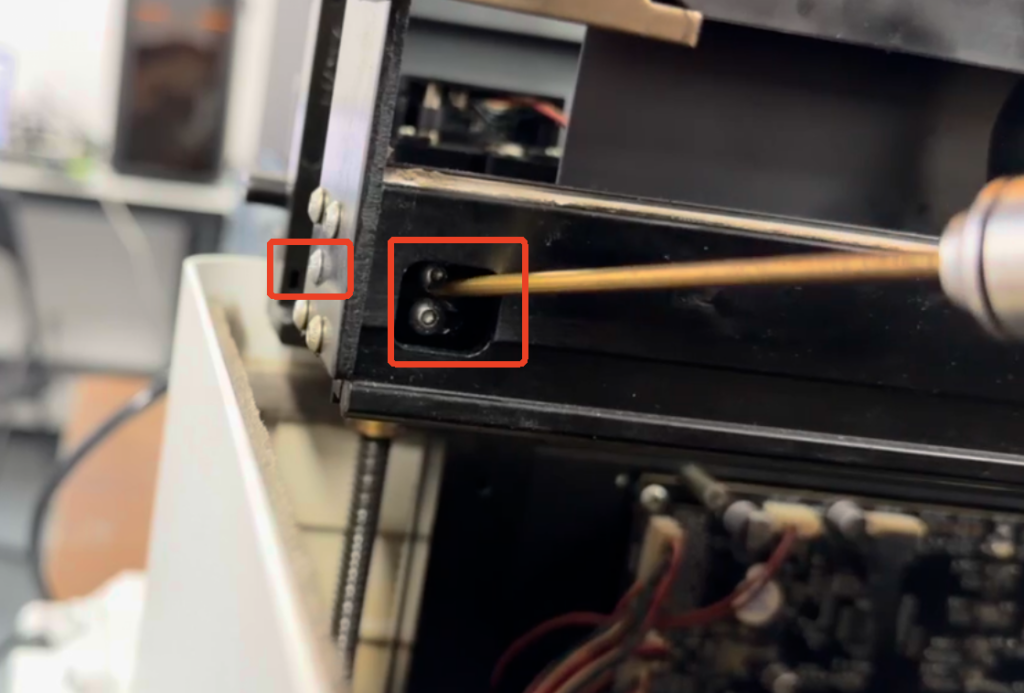
Step 3: After reinstalling the screws, manually move the laser head to check whether it moves smoothly without any sticking or unusual noise. Make sure the belt is secure and has proper tension, without being too loose or too tight. If the belt is too tight or too loose, adjust the screw tightness accordingly.
Step 4: Reinstall the side panel that was removed earlier.
Verify After Replacement
- Move the laser module manually.
- Confirm smooth movement.
- Power on the machine.
- Run a small engraving test.
Troubleshooting
FAQ:
Q: The belt is installed but the laser head moves unevenly.
Possible reasons:
- Belt tension is too loose
- Belt tension is too tight
- Belt routing is incorrect
Q: Engraving is still offset.
Please check:
- X-axis belt tension
- Pulley screws
- Laser module screws
Contact Wecreat support
If the issue persists, please contact WeCreat Support and provide:
- Machine model and SN.
- Photos or a video showing the belt installation and the issue.